Although bird eggs
do come in slightly different shapes, they do seem to follow a pattern of a
slightly pointy end with a somewhat thicker base.
This is how I
created a pleasing and regular egg shape.
Open a new image 600
X 600 with a vector background.
View > grid , guides, and rulers ticked.
Make sure your grid
values are 100 horizontal and 100 vertical.
Place Guides in the
following positions:
Vertical at 175 and
425
Horizontal at 330
Select your ellipse
tool.
Make sure you have
selected ellipse not circle in the tool bar.
Foreground null,
background color of your choice.
Draw an ellipse from
x:175 y:100 to x:425 y:500
Select the pick [object selector] tool
and zoom in and make any minor adjustments to make sure your ellipse is plum
within the grid and vertical guides:
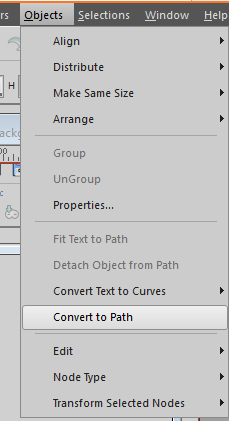
Object> convert
to path:
Select the Pen tool
- your nodes will become visible:
Zoom in and Click on
each of the lateral nodes and holding down your left mouse button pull each one straight down to your
horizontal guide:
If you wish to have
your egg a bit more "pointy", click on the node at the top and adjust
the "arms" to make them shorter.
When you are happy
with your shape, give your egg shape a name.
Select your egg with
the pick tool [or object selector]
Right click and
Export>Shape [Or File> Export > Shape]
I usually use the
same name as I have given the shape as this makes it far easier to find it
again when I want to use it.
If you wish to place
it in a particular folder within your PSP shapes click on the little file icon
to open the file location box [yes I have a LOT of folders:) ] :
To use your new
shape simply select it from your dropdown list of PSP preset shapes:
I used the egg shape
with a soft pink brown gradient and added shading and texture:
You can download a zip with a .pdf version of this tutorial and gradient jm_brown_egg_1 HERE
You might also like to look at this tutorial, using an egg shape.
Please feel free to comment and post any queries.


No comments:
Post a Comment