
There are many reasons for creating a
monochrome image, not the least being to be able to then blend an
image into a larger background such as in an album page.
I find that creating a good quality BW image
first and then recoloring creates a better final image compared with simply
colorizing.
Later versions of PSP have an excellent
filter, Black and White film which I use a lot.
The filter works in a similar manner to
splitting channels where you can select the best image from one or a
combination of the channels with the added advantage of an ability to alter the
brightness and clarity at the same time.
You will find the filter under effects >
photo effects > Black and white film.
It is best to begin any alterations with the
values in a neutral position [factory default]:

If you then hit the "suggest color"
button, that might be all you need to do before tweaking the brightness and
clarity.


In the image of the Moorcroft vase below, I
used these settings. - The suggested colour didn't give enough definition of
the "beak" area on the puffin.

You can see an improvement using the BW film filter compared with simply desaturating the image:

The filter allows a lot of manipulation in
one action. In this case I didn't make use of the colour wheel but that would
be ideal in many images.
It is then a simple matter to colorize. [
Adjust > Hue and Saturation > colorize]


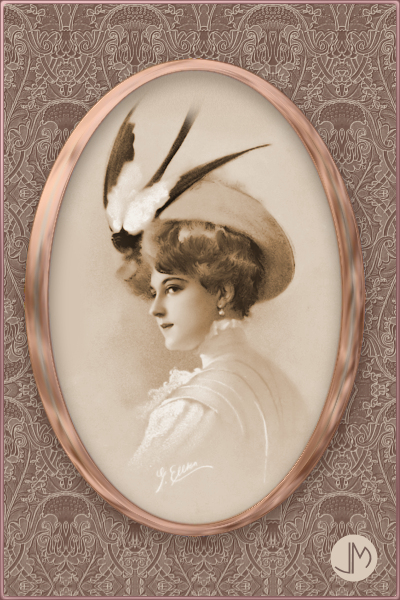
On the image below I used different settings
to maintain the softness.


Colorized to Sepia Colour [You could use the
photo effects > sepia but Colorizing gives more options]:
Old photos often have different
"sepia" colours which seldom combine well on a page. By using the BW
film filter on them first, then recolouring them with the same settings the result can be more
pleasing.
You can be pretty
creative too, combining different monochrome images in the one layout:

Judy


